How to Troubleshoot ‘Air Flow Failure’ of Agilent 700 Series ICP-OES
If too much dust getting into the Air flow sensor, then both the Air Flow sensor Inner Tube and the Honeycomb Filter under the Vacuum Power Tube socket requires to disassemble and to clean/purge them at the same time.
If Air Flow Sensor is replaced but skips cleaning anything as described above, then the inner flow of the Power Tube will still remain below normal value so, will show ‘Air Flow Failure’ again.
How to Troubleshoot if ‘Plasma Lights Then Goes Out’ in Agilent 730 ICP-OES
Here are the thoughts for this case.
1. Ensure the purity of Argon and check the pressure of regulator.
2. Check D6, if D6 light on once after plasma on then there should not be the problem of optics fiber normally.
3. Bypass ALC and check plasma.
4. The strange value is TP16 which is too low on 1.2KW and this might be indication of problem with tube socket.
5. Yes, the RF Power tube is most common part can be suspected in most RF situation and next is RF board. The others are HVPS or filament capacitors.
How to Troubleshoot Plasma Ignition/Plasma Shutdown Fault of Agilent 700 Series ICP-OES
Please be careful to check the plasma step by step to isolate the problem. The error F1255 and F60304 just says the plasma has gone by anything after the stabilization of the argon flow inside the torch. In most cases it relates to a nebulizer problem or the sample type.
If the system always requires 2 or 3 tries to ignite the plasma, it may be caused by the argon supply flow are not sufficient to cross the purge and purge delay phase. A simple measure is to increase the supply gas pressure and decrease the purge phase time from 15 second to 10 second to compensate the pressure drop during ignition.
After the plasma successful to ignited, please check the sensitivity of the fiber optic inside the up right corner of the sample compartment.
(1) Introduce the water blank
(2) Decrease the power by each step 0.1KW starting from 1.2KW to 0.7KW in the "Quick" tab [the plasma must stay on when the power go down to the 0.9KW (normal) or below 0.8KW (best)]. If the plasma has gone in 1KW or upper, it means that the fiber may have some problem. You can simple to pull out the fiber gently and cut the first few millimeters then move it back to the original place.
If the software shown being inactive, it may be caused by the Auto-refresh button are not already uncheck and you need to input the service password "virgil".
N.B.: If the plasma goes off abnormally, the cause may be the filament voltage supply stopped. This may indicate that the problem is coming from the Vacuum Power tube and the filament supply circuit. Please take out the Vacuum power tube from the RF box and carefully check the socket inner surface and filament Pin surface connection on the Vacuum tube.
F60304 Error Message
There is no meaning for error F60304 as this error only notices that the plasma has gone out. It doesn’t indicate whether it is due to hardware problem or something else.
It may be due to the fiber optic which could be dirty or melted. If the fiber optic cable becomes dirty its sensitivity will be lowered and cannot detect the plasma properly. The tip of the fiber optic cable can be cleaned with finger to remove any dust from it. The fiber optic can also be melted. Also a clean torch can be used.
Reference Notes
(1) Cone purge just only will turn ON when the plasma ignition in progress (your system is normal)
(2) Poly Boost turns ON or OFF during the software startup and it is controlled by the preference setting inside the "preference" of the software (turn Polychromator boost ON). It does not always turn ON automatically.
(3) Plasma ON are not affecting by the poly boost ON /OFF, meaning that even the poly boost is always set to OFF, I suggest you to check the other issue (like the fiber optic condition of both end surface).
(4) The Argon purge delay (20Min) is controlled by the windows registry not the software itself. (Please open the registry editor by typing "regedit" in the windows Run function inside the "start" menu. When the registry editor opened, please open the link as referred in the picture below then change "MaxPurgeDelay" back to 20 Min.

How to Inspect the Cause of 'Plasma Ignition Failure' in Agilent 700 Series ICP-OES
Inspect the Cause of Agilent 700 Series ICP-OES Power Tube Failure
Once the ignition button is pressed the ignition procedure will go as following steps:
(1) Turn ON filament and wait about 10 seconds to warming up (if no any error occurs).
(2) Turn ON Gas box, Pump to follow the ignition program about 25 seconds (If Gas supply is not triggering the low argon sensing about 50 PSI during purge phase).
(3) Turn ON the power of RF High Voltage power supply before ignition spark generate in about 5 seconds (If all interlocks fulfilled, High Voltage power supply cooling fan Ok, supply voltage not lower than 180V).
(4) Command the High Voltage power supply to output 2KW power and generate a High Voltage spark inside the plasma gas tubing.
(5) Ignition successful (Fiber optic sensed, RF High Voltage power supply no error, current sensor incorporating the work coil has a proper voltage feedback).
If the ICP-OES stuck on the first stage, the problem is relative with the filament supply circuit and RF vacuum power tube. Need to check all the connection for filament supply, Power Control Board, Solid State Relay, Filament Transformer, Filament Transformer cable (thick blue cable), RF Vacuum tube socket/filament connector surface condition, RF Vacuum tube condition.
Process of Locating RF Fault Area in Agilent 700 Series ICP-OES
(1) Check the voltage output from the filament transformer (thick blue cable). Once you press the ignite button or directly change the HV1 to “ON” at the diagnostic Page (password: WALLABY), the voltage should be around 4 to 5V AC using normal multi-meter or 6.5V AC using RMS multi-meter.
(2) Observe the stabilization time. If the voltage goes out after a few seconds but the voltage is steady, it means that the control is OK but the sensing has a problem (check the sensing cable and circuit from/to power control board).
(3) If the voltage goes out after a few seconds but the voltage is not steady, it means that the loading has a problem (RF Vacuum tube, Vacuum tube socket, cable connection).
(4) If the voltage are never present after pressing the ignite button or directly turn “ON” HV1, it means that the solid state relay control circuit or filament transformer has a problem (Check the Solid state relay control input/output, Power control board filament circuit input/output).
(5) All of the above mentioned procedures assume that the communications for Gas control PWB, RF interface PWB and the instrument control PWB are working properly. Ensure the LED D5 at RF interface board, D4 at Gas control board flashes constantly; if anyone does not flash, it indicate that the respective board has a problem.
How to Diagnose Agilent 700 Series ICP-OES RF Failure
Beware of the red wire (high volt output cable) of HVPS. It cannot be directly removed for High volt test when the system still in normal mode but you can change the circuit, refer to the Troubleshooting guide HVPS test to do this.
Some of the RF failure may be caused by the small High voltage capacitor leakage (cause by faulty themselves or dust/moisture mixed together) which are installed inside the small RF box. Due to these capacitors are for feedback noise bypassing, so you can simply disassemble them for testing/inspecting their conditions if the HVPS and RF interface are normal.
N.B.: If you have already replaced the HVPS and RF interface, it indicates the problem may come from the parts inside the RF box (e.g. small HV capacitors, big HV capacitors, Grid oscillation capacitors, Grid circuit, current sensor, RF parts isolation, loom and connect deform etc.....) please be patient to test if you are faced with the RF failure like this.
How to Check ‘High Voltage Power Supply (HVPS)’ for Fault: Is HVPS Ok or Not
Open Diagnostics page and click the ‘service key’ icon. Enter the password ‘virgil’
Open the RF tab page and set the filament to ‘ON’ stage 1
Click HV stage 2 & click ‘apply changes’.
At this stage the HVPS fans should be running & the green LED on the HVPS should be ‘ON’
If the fans are not running etc. check the contactor is ‘ON’ by measuring 24vdc between pin 1 & 2 of 2PL1 (the 2 pin connector on the HVPS). Or disconnect and reconnect this plug. You should hear the contactor clicking. If the contactor not energizing, check interlocks, RF door, emergency plasma OFF button & RF PWB.
If contactor is ok, check for 187 - 264vac on the mains terminals of the HVPS. If not ok, check circuit breaker on the back of the instrument & associated mains components.
If HVPS fans are running & green LED is ‘ON.’ Set RF power to 1KW & click ‘apply changes’
If no errors check RF PWB P/N: 02-101498-00.
TP19 is ~ +4v which equates to ~4KV. Yes, then HVPS is OK.
If “RF failure” error, connect clip lead from TP5 (-15v) to cathode of D17 on RF PWB. Check TP19 is ~ +4v. Yes, then HVPS is ok.
If TP19 is 0v with no “over current” error.
Check HVPS PL4 pin 14 (enable) is > +2.4v. If ok, check PL4 pin 1 (Cntrl ) is ~ +5.7v. If ok, HVPS is faulty.
If “over current” error, disconnect HV wire at HVPS. Restart stage 1 filament & HV stage 2, Enter 1KW and ‘apply’ again. Measure TP19 ~ +4V, HVPS is ok. Fault is in RF system. If still “over current” error, HVPS is faulty.
How to Troubleshoot Big Spark and Noise Periodically Coming from the RF box While Plasma is Active.
Seem the problems are not worst to require replacing the whole RF box. I suggest you to fix the arcing point by the visible check inside the RF box then isolating or make more space between the arcing points are OK.
Beware of three capacitor inside the small RF box are most easy to arc by the spacing and dust accumulation, and then you can easily isolate by removing them.
How to Troubleshoot Poor Contact on Vacuum Power Tube Pins and Socket
Please beware of the example on below photo. The lower two pin are the filament supply. Refer to the second and third photo then you can see some dark point on the pin surface which is the bad contact point. Then indicate the socket will have the same issue but due to the socket is made by something like iron metal, so there is quite difficult to polish back to the good contact point. So, in this case, it requires replacing both the vacuum power tube and the socket parts together. If you just replace the vacuum tube only, then the same problem will appear in the coming short period (few months).
How to Troubleshoot if ‘Plasma Shuts Down Abruptly With Huge Spark and a Cracking Noise’
Huge cracking noise should come from the Vacuum tube socket/Pin connections for filament supply. Please remove the vacuum tube and check the pin and socket surface. You may require replacing the vacuum tube and socket base together if the socket pins seem burned.

Agilent 700 Series ICP-OES Polychromator Alignment Procedure
1. Two Argon (Ar) peaks should appear at the upper end of the Echellogram, one at the right corner and the other at the left corner.
2. Polychromator alignment is performed using 5ppm Zinc (Zn) solution or 15 elements Standard (Tuning solution). Zinc (Zn) peak should appear at the center of the Echellogram. The color of the Zinc (Zn) peak should be yellow. All 15 elements must be available inside the camera focus.
3. After replacement of camera 1000 ppm Sodium (Na) solution is needed for adjusting the camera. In the software, from Polychromator Alignment go to ‘Location’ tab select ‘Sodium’ from ‘intensity map’ section. Two orange colored sodium peaks should appear at the center of Echellogram, one peak in the right portion and the other in the left portion.
4. The camera adjustment screws should be turned simultaneously in reverse direction to each other. The camera has defined lines for each specific wavelength.
5. During camera alignment the camera interface board has to be placed at the service position which is on left side of its standard position.
6. The Polychromator housing has several mirrors and a grating. The Polychromator housing temperature should be maintained at 35°C for stability. Since the housing is metallic, any temperature change could disturb the alignment of mirrors. This temperature is called the casting temperature.
7. ICP-OES low power supply switch should be kept turned on to maintain temperatures. After turning on the low power supply 3 to 4 hours should be allowed for the system to stabilize.
8. Polychromator alignment screws are located at the back of the instrument. The top left screw is for ‘Focus’. The top right screw is for DLA which is used for adjusting intensity. The bottom left screw is for W/L which is used for adjusting the Zinc peak at the center of Echellogram. If both the W/L and DLA screws are used for adjustment, then the ‘Focus’ must be adjusted. After each adjustment the instrument should be allowed some time for stabilizing the new settings. The W/L screw should only be turned not more than 1/16 turn.
9. ICP-OES W/L calibration should be performed monthly or each two months based on frequency of sample analysis.
10. After re-installation of torch, torch alignment is required. The distance between RF coil and inner channel of torch should be 2-3 mm.
11. Manganese (Mn) is used for Torch alignment because it stands at the center of analytical zone of the plasma.
Agilent 700 Series ICP-OES Manual Adjustment Procedure
Camera rotation: Only required after camera replacement. It doesn’t change itself.
Focus adjustment: Resolution fails, camera changed.
If image is completely lost and you don’t know where to start, the first thing to do is to make the M5 mirror parallel to the body of casting. The distance between casting body and M5 should be 5mm.
Wavelength adjustment: If Zinc (Zn) 213 peak shifts due to thermal drift or with time. Check at installation, PM Service. If W/L calibration fails.
DLA adjustment: Same as W/L. Loss of sensitivity. Check the argon ratio to adjust. Argon ratio adjustment is only available in 72x/73x. It is not available in 71x.
M1, M2 and M3 are replaceable. If mirror contamination is suspected, there might be sensitivity loss. M3 should be started with. Because M3 is easy to replace. It also less exposed to argon and more exposed to environment than the other two.
M3 adjustment: Laser adjustment. M3 can be replaced without need for adjustment.
M1+M2: Laser adjustment. Preferred or replace 1 at a time and adjust mirror for maximum sensitivity.
System sensitivity loss can be checked from W/L calibration file. Individual W/L should be checked for peak height and SBR value change over time.
Before changing mirrors, the window should be changed first because it is exposed to UV.
Loss of sensitivity first occurs at UV W/L range.
72x/73x camera has less pixels than 71x camera. The advantage of fewer pixels is that it is faster because the electronics doesn’t have to read large number of pixels.
In new system installation, there may require DLA adjustment. Due to temperature change there might be mechanical movement of M5. Two/three months after installation if customer complains of low intensity, then DLA adjustment should be performed.
In new installation Argon ratio (3.05) should be checked and adjusted to the factory value. The ratio is usually mentioned in the M5 mirror back panel.
Loop back test. Precautions.
LED test: Shutter closed. No matter plasma On/OFF. Just to test focus of camera. To test the pixels of camera. If there is any damaged pixel.
LED test is available in low end systems.
In low end systems loop back test gives a different image.
Rotation once completed no need to check it again.
After adjusting DLA and W/L the ratio of ‘1’ will change but no need to check rotation again.
W/L and DLA: Small tweak.
Focus: Not normal to change.
Polychromator is ok but still some problems in sensitivity. Need to check pre-optics and sample introduction.
After W/L adjustment W/L calibration and Torch alignment have to perform back and forth to regain sensitivity and to get maximum signal.
SSR: Solid state relay, just above the filament transformer.
Agilent 700 Series ICP-OES Routine Servicing Procedure
1. Open front right cover and check if lubrication of moving screws is required.
2. Check the Instrument status from the ‘Status’ screen on Agilent ‘ICP Expert software’.
3. Go to ‘Details’ tab from Instrument setup window. Press ‘Retrieve Details’-> if filter change required, replace relevant filters and update dates in maintenance dates section. If new filters are not available just change dates to current date. -> Press ‘Store Details’.
4. Go to W/L calibration tab-> Aspirate DI water and run Dark current Scan/detector calibration (for Vista systems) -> Store dark current. If calibration fails, checks for leaks in the Polychromator housing. Seal any leak by tightening housing screws.
5. Aspirate 15 elements standard (Tuning solution) for 1 minute with first pump-> Another 1 minute with normal pump speed and allow the flow to stabilize ->Calibration. More than 90% lines must be used for a valid calibration. If calibration fails, -> try again. If calibration fails again, adjust the Polychromator.
6. Press Calculate drift/Hardware Calibration (Drift, Shutter etc).
7. Go to ‘Optics’ tab-> Check ‘At home’-> press ‘Horizontal/Vertical’ button.
8. Go to ‘Torch Align’ tab-> Aspirate 5 ppm Manganese(Mn) solution or 15 elements Standard-> Select ‘Horizontal’ or ‘Vertical’ from ‘Orientation’ section-> Press ‘Torch Scan. To check humps or jerks in the scanning line press ‘Overlay torch scan’. Horizontal value should be less than 2. With time the scan line will become smoother.
9. Check different parameters in other tabs.
10. Open the ‘Polychromator Alignment’ window.
11. Align the Polychromator with Zinc (Zn) solution or 15 elements Standard. The Zinc (Zn) peak should appear at the center. All 15 elements must be inside the camera.
Agilent 700 Series ICP-OES Operating Conditions
Different electrons excited to different molecular orbit. Thus while coming to lower orbits, electrons discharge different energy making W/L spectrum.
OneNeb: New type of nebulizer. Uses plastic.
If Lithium (Li) is run it will reduce the lifetime of torch. High concentration of Li can damage the torch in 8 hours.
Organic samples running without oxygen addition produces greenish analytical zone. With oxygen addition the greenish area becomes smaller.
In Axial system a large cross section of plasma is viewed by optics as compared to Radial system. That’s why we see a large difference of intensity between Axial and Radial system.
Cone purge in Axial system: Argon flow 3l/m.
Zn 213 nm hard: 1.2kw or above, 0.7l/m or above, 10mm view or above.
Al 396nm Soft: 1.4kw or below, 1.0l/m or below, 14mm view or below.
Robust plasma conditions: 1.2kw RF power, 0.8l/m nebulizer flow gives best performance for most elements.
720/730 systems have Automax facility.
Increasing replicate read time will also increase sensitivity.
Red tip in the plasma with 1000ppm of Li. The height of the red tip can be controlled by adjusting nebulizer gas pressure.
In Radial system the height of the red tip is 1mm from the edge of torch. In Axial system the red tip resides at the middle of second turn of the work coil.
SPS3 A/B Autosampler Calibration tool. P/N: 72-111076-00. If SPS3 Mainboard is replaced it must be recalibrated.
Agilent 700 Series ICP-OES Installation Procedure
During installation, after turning ON the instrument it should be allowed to stay ON overnight to stabilize the Polychromator temperature at +35°C.
After overnight stabilization run W/L calibration→ Dark current test→ Torch scan→ Torch alignment.
Torch align→ W/L calibration→ Torch align. After W/L calibration torch align should be performed because of shifting of wavelengths.
Torch Align parameters: For Axial system minimum 400,000counts, 1.2million for new system. For Radial system, minimum 40,000counts. Ten times signal increase for Axial system.
SBR: Signal to Background ratio.
Always have solution introduced otherwise torch might melt.
Service password gives Instrument test option in the window menu. Create new instrument test worksheet→ Select proper spray chamber.
Run the latest instrument test worksheet. Generate instrument test report→ about six pages.
Installation tests: A) Resolution. B) SBR. C) Precision. D) Calibration accuracy. E) Detection limit.
Resolution runs from resolution worksheet. If it fails optics needs to re-adjust.
SBR runs from QC worksheet. → Precision→ Calibration.
If SBR fails, there is no point of knowing DL. The hardest rest to pass is SBR. Contamination could come from blank, nebulizer, Spray chamber.
Poor precision: Reason may be Nebulizer, Pump tubing, Spray chamber, Transfer tube, Torch.
Detection Limit (DL) fail: Same reason of contaminated Nebulizer, Spray chamber, Pump tubing etc.
Wait for minimum 5 minutes after changing between sample and blank to allow proper washout.
Best sequence to run installation tests: Resolution worksheet run first (STD only) → QC STD only→ DL STD only→ Wash 10 minutes (blank) → QC blank→ DL blank X 5.
Notable Points About Agilent 700 Series ICP-OES
1. Shear gas comes from the sample cone. It repels the unwanted portion of the plasma and facilitates to focus the analytical zone of the plasma.
2. The camera cools by Peltier cooler and the Peltier cooler cools by water circulation.
3. Argon (Ar) charcoal filter should be replaced in every six months. Argon purges out oxygen from the polychromator and the camera. Argon purge is especially important for wavelengths less than 200 nm. Contaminated Argon will damage lenses and mirrors.
4. At <200nm oxygen reacts with mirrors. The system uses purge to remove oxygen (air) from the polychromator. Camera also purged by purge gas.
5. The Pre-optics section starts at sample cone and ends at shutter.
6. Inside the pre-optics there are two mirrors that focuss the analytical zone of plasma.
7. The air filter at the top of the instrument should be kept clean to ensure proper air exhaust.
8. In Vista Pro ICP-OES there are four filters. Two charcoal filters, one molecular sieve type filter, one particle filter (Nicron filter).
9. Low flow rate of exhaust air would damage the RF tube also it will increase temperature inside the instrument.
10. In the RF generator there is a circuit which generates an initial power which then amplified to 2.5 kW by the RF power tube (Amplifier). This power is then applied to the RF coil (induction coil). The RF coil then generates a high frequency magnetic field due to induction (Continuous changing in the direction of current flow). The magnetic field ionizes Argon. The spaces between the turns of the RF coil should not be changed otherwise the coil will reflect some RF power which would damage the RF generator.
11. RF power for each element is different. The Automax function in ICP Expert software adjusts the RF power and nebulizer pressure. The Automax only checks elements and is not concerned with concentrations. Nebulizer pressure is a very important factor.
12. For higher concentrations, Radial torch with V-groove nebulizer and Sturman-Masters spray chamber are recommended. They are also recommended for high viscous samples. V-groove nebulizer and Sturman-Masters spray chamber is standard for radial torch system.
13. Radial system standard: Sturman/Masters Spray Chamber.
14. For volatile samples (i.e. Hg, As, Sn, Se, Sb, Te, Bi) ultrasonic nebulizer with programmable spray chamber should be used. In programmable spray chamber temperature can be controlled from negative to positive values. Negative temperature would allow volatile samples to stay in the plasma for more time. Positive temperatures would be helpful for high boiling point samples.
15. Spray chamber’s job is to remove bigger droplets. Generally glass centric spray chambers are used.
16. K-style nebulizer works on ‘Venturi’ effect.
17. Detection limit of potassium (K) is too much higher. So, for analyzing potassium internal standard should be used.
18. Ionic emission is recommended for ICP-OES. It is more reliable.
19. Argon (Ar) saturator is used to prevent deposits in the torch.
20. After completion of analysis, the system should be ringed with 5% HNO3. Then release tubes from the peristaltic pump.
21. Torch cleaning: Aqua Regia should only be used for the contaminated portion of torch. Then it could be cleaned with hydrofluoric acid. Finally, run ultrasonic bath for the whole torch with 10% HNO3. Ultrasonic bath cannot be used for nebulizer. It may block the nebulizer. Nebulizer should be cleaned using special tools.
22. There are two types of analysis methods one is concentration method and the other is standard addition method. From preference maximum error margin can be set. Samples having too high concentration than the highest concentration standard may not give appropriate result because the calibration curve does not remain linear after certain concentration level.
VSDA- Varian Software Database Administrator.
IEC-Internal Element Correction.
Axial System-Higher sensitivity.
Radial system-Lower sensitivity, recommended for dirty samples.
W/L coverage-167nm-900nm.
Vista Pro: 72x/73x
Vista MPX: 71x
MPX and 715 are slower system because they employ camera which has slower response.
Agilent 700 Series ICP-OES Hardware Information
Liberty RF tube is water cooled. It has water circulating tube.
700 series RF tube is air cooled.
PWB→ Printed wire board.
The RF tube is a vacuum tube.
Cloud of electron released from Filament.
Top head of RF tube is the Anode.
Middle pin of RF tube is for Vacuum.
The lower part of RF tube and pins contains Grid and Filament.
After installing new RF tube increasing filament voltage to 6.6VAC for first 1000hours will increase tube life time. After installing new RF tube filament on time should be reset to 0 hours.
When water chiller is turned off filament is turned off.
RF tube filament life time approximately 5000hours.
With time tube filament becomes thinner due to continuous electron emission .The filament than behaves like a tungsten bulb filament. If might switch on/off.
ICP-OES Torch Cleaning Procedure
(1) Torch cleaning procedure: Aqua Regia is to be used for cleaning the contaminated part of a torch. The contaminated part of torch has to be kept in Aqua Regia for about 10-15 minutes (until chemical reactions are visible). After that 2% Hydrofluoric acid could be used for around 10-15 minutes for polishing the contaminant free portion. Finally rinse in ultrasonic bath with 5-10% HNO3 at 60°C-70°C temperature for about 1 hour.
(2) Sample compartment cleaning: Sonicate sample compartment parts in 10% HNO3 without heat for about 1 hour just to dissolve and soften deposits. Then sonicate for 30-60 minutes with 60-70°C temperature. Transfer tube could also be sonicated without heat in 10% HNO3.
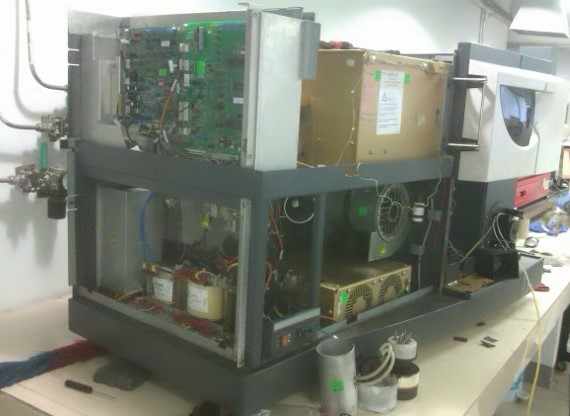
Agilent 700 Series ICP-OES Troubleshooting Support Information
Error and debug files.
Noise: Look for black mark caused by discharge. Look for damaged capacitor in the filter circuit. Any part with black mark should be replaced.
Does plasma light? Light and go out? Go out after X hours?
Gas flow ok? Torch/work coil conditions/location?
Filament hours?
RF power tube has a life time of 5000 hours of filament on time.
After 5500hours power tube may fail.
A new RF tube will require less voltage to generate same RF power.
Power unobtainable: RF tube might have failed.
One common error is grid bias error.
Unable to measure test point voltages and currents: Connect a wire between TP3 (+15V) and diode D17 that will override all allowing the voltage and current measurement.
Record filament hours.
Set filament hours=Zero.
Measure filament voltage/current.
Return to original hours (make sure over 100 hours).
Measure filament voltage/current.
With ALC test jumper removed plasma power may be taken go up to 2kw.
Agilent 700 Series ICP-OES Operating Requirements
For long time running Liquid nitrogen is best.
Gas Argon (Ar) 99.996%, 550Kpa (80psi), 1/4" Swagelok.
Power: Single phase 208V, 220V, 240V, 30Amps, Chiller power, Exhaust power, PC.
Chiller water: 20°C, 1.1L/m, 400W for Radial, 1000W for Axial.
For Axial system 1.8kw power might melt the torch.
Axial system RF power increases up to 1.5kw or above: Increase plasma flow to 18L/m, Auxiliary flow to 2.25L/m.
Argon is best for performance.
Nitrogen is ok for non UV W/L.
In Axial system cooling of cone is required, that necessitates high cooling capacity.
Related Reading