Q: What are the Preventive Maintenances of Hypertherm Powermax Plasma Cutter Machines?
Powermax optimized performance and cutting problems are related to five main areas on a Powermax cutter. These five items are the gas filter, consumables, torch, torch cable, and internal components of the plasma cutter. This article will discuss how to check each item, perform maintenance and replace anything if needed.
Before starting maintenance checks on a Powermax, it is preferable as a safety practice to unplug the power cord from the mains power, disconnect the gas supply, and turn off the power switch on the unit.
Gas Filter
Filter and bowl inspection procedures might differ from machine to machine. However, inspection of these elements involves the same. First, the filter and bowl have to take out of the unit. The Hypertherm operator's manual offers details on how to remove the filter and bowl.
After removing the filter and bowl from the machine, inspect the filter device for oil, dirt, or debris buildups. If these contaminants are present, then replace the filter. Use a clean and dry fabric to wipe any condensation or oil from the filter bowl.
Check the filter bowl O-ring at the top. If the O-ring is torn or broken, replace it with a new Hypertherm O-ring. The O-ring size will depend on the type of filter bowl used in the machine. The hypertherm operator manual provides instructions for filter bowl installation and O-ring replacement.
Consumables
Consumables inspection should be a daily job. Begin with a check on the external retaining cup for cracks or burns due to protracted usage. Inspect the electrode and nozzle as a duo because they evenly wear. Inspect the electrode's back for excessive pitting and pit depth on the hafnium at the middle of the electrode. The pit depth should not exceed 1.6 mm or 1/16 inch. An on-round nozzle orifice will suggest excessive wear. There should be no marks of cracks or excessive wear on the swirl ring surface. During assembly of torch components, ensure that gas holes are not blocked or deformed. Use only the finger tight on the retaining cap. If the retaining cap is over-tightened, the swirl ring might suffer damage due to compression. If one or more of these issues are spotted, replace the defective component with the new original Hypertherm consumables. Hypertherm operator manual details instructions for the correct installation of all consumables.
Torch
The user should inspect the torch and torch cable every three months. Start by removing the retaining cap and consumables, then put them in a clean place. On the torch body, inspect the O-ring for cracks, rips, or tears. If the O-ring looks dry, apply a slight Hypertherm lubricant over it to lubricate it. If the torch O-ring found as broke, replace it with a new Hypertherm O-ring and lubricate it using Hypertherm lubricant. Check the torch body for fractures or exposed wires. Examine the torch body's brass threads for signs of damage. Replace any damaged component. Turn the torch and identify the electrode seat inside the torch's main body. Inspect the electrode seat for any pitting which may happen over time. The main torch body contains three vent holes which may get blocked with debris or slag. Use compressed air to clean blocked vent holes.
Torch Cable
Check the safety trigger operation and ensure it works properly. Inspect the torch cable from the base of the handle up to the quick disconnect plug to identify cuts or cracks. If any of the mentioned items have defects or damage, reach out nearby Hypertherm distributor for needed parts replacements.
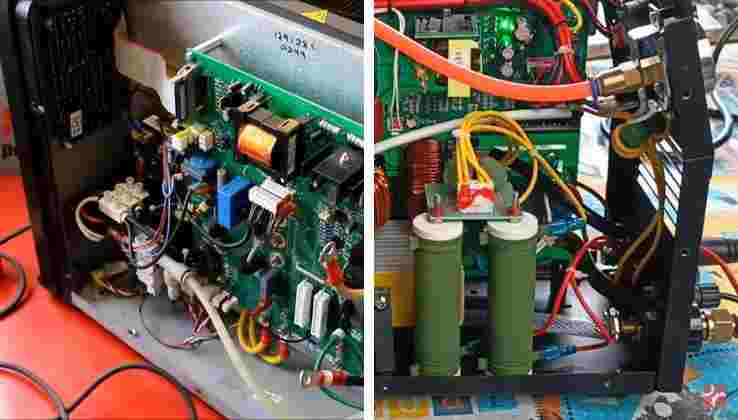
Maintenance of Internal Components
Finally, the cover has to be opened and clean the inside of the machine. Users should perform this maintenance once every six months. To access the insides of Powermax 30, 30 XP, 45, and 45 XP machines, unscrew the two Phillips head screws on both sides of the handle. Softly pull up the handle to take the screws out. Slightly tilt the tops of the front and rear panels away from the machine, then pull out the handle. Now, slide off the cover.
In the case of Powermax 65, 85, 105, and 125, unscrew the torx screws on both sides of the unit. After removing the screws, the machine's cover will slide upright.
There are two sides inside of Hypertherm Powermax machines. The dirty side has to be cleaned and dried up. In time of use, the machine's dirty side may draw in debris. Using a vacuum cleaner, remove any dirt that might have accumulated. Blow away any remaining dirt with compressed air in a risk-free direction. After cleaning, put the cover, handle, and screws back in place based on the model of the Powermax that you use. Reconnect the input power, input gas hose, and switch on the power switch. The machine is now ready for cutting. If you are in trouble with Powermax systems, contact your regional distributor of Hypertherm or a certified maintenance outlet for support.
Also Read: Plasma Cutting Consumables – An Expert Guide
Q: Hypertherm Powermax Pressure Faults. How to Identify the Symptoms of a Low Pressure Error for the Powermax 30, 30XP, 45 and 45XP.
Related Posts